

Background
I wanted to test some Windows tools, alas I don't have a Windows machine at home. However, I didn't want to spend money on purchasing Parallels Desktop. #cheapskate
Thanks to the Reddit community, I discovered UTM - an open-source QEMU (mac.getutm.app) emulator for M1 Macs. While it took me a while to set up, I was impressed when I successfully set the Windows virtual machine up. This is especially true when some software or peripherals require updates or have yet to be fully optimised for M1-based Macs.
UTM has comprehensive documentation to set up Windows virtual machines (VM). However, there are still some gaps that require some digging for information. So here I am, to document things to look out for when you are setting up (also for my future reference)!
Getting Started
For easier setup, it is recommended to have Homebrew installed.
/bin/bash -c "$(curl -fsSL https://raw.githubusercontent.com/Homebrew/install/HEAD/install.sh)"
Challenges
Initial setup
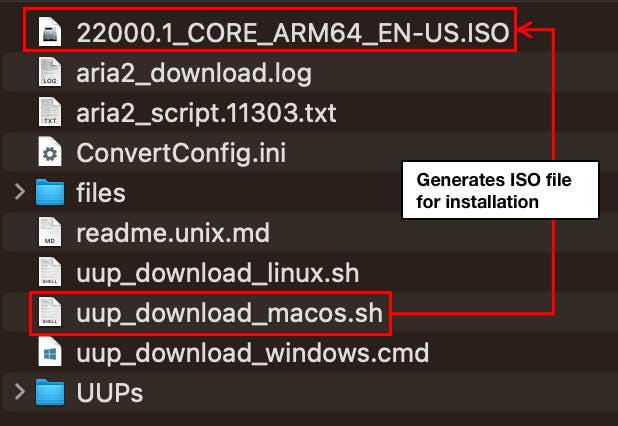
Upon downloading the UUP dumps of the target OS, there is a need to run a script uup_download_macos.sh to generate the ARM build ISO.
- I completely skipped reading the README which is included as part of the UUP dumps 😅 Though there were some required packages such as
aria2not being included.
Packages that face installation issues
aria2- The error message shown by the script, shows variation in the names such asaria2candaria2dwhich threw me off whenbrewcouldn't install the package. Only after searching up the packages, did I realise the package required isaria2chntpw- It seems there are some issues with the intended packagesidneys/homebrew/chntpw. Following the link provided, the alternative version should be installed instead
brew tap minacle/chntpw
brew install minacle/chntpw/chntpw
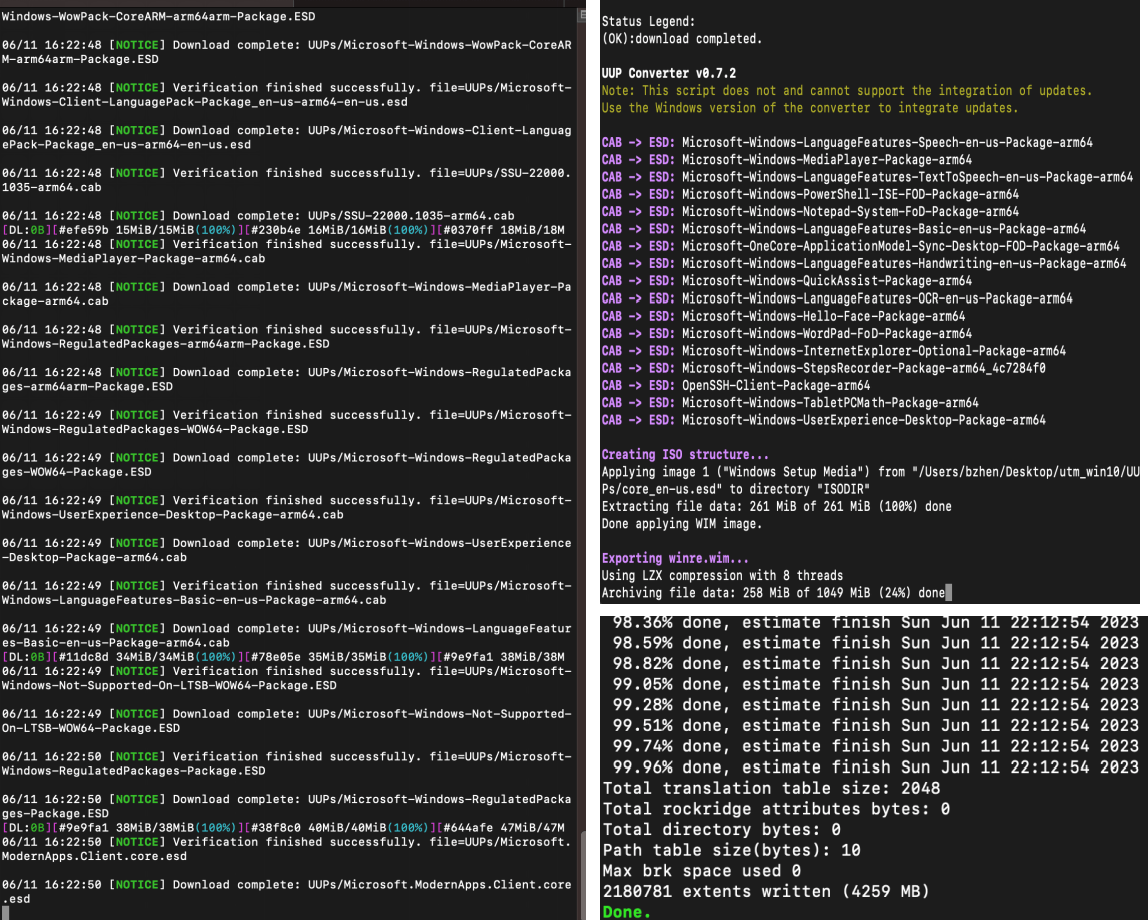
Broken ISO
This is on me. I pretty much ignored the warning note shown in the documentation 🤦🏻♀️
I managed to solve it by using the ARM64 build of the UUP dump for Windows 11 21H2
Below are some screenshots of the console output shown when generating the ISO file
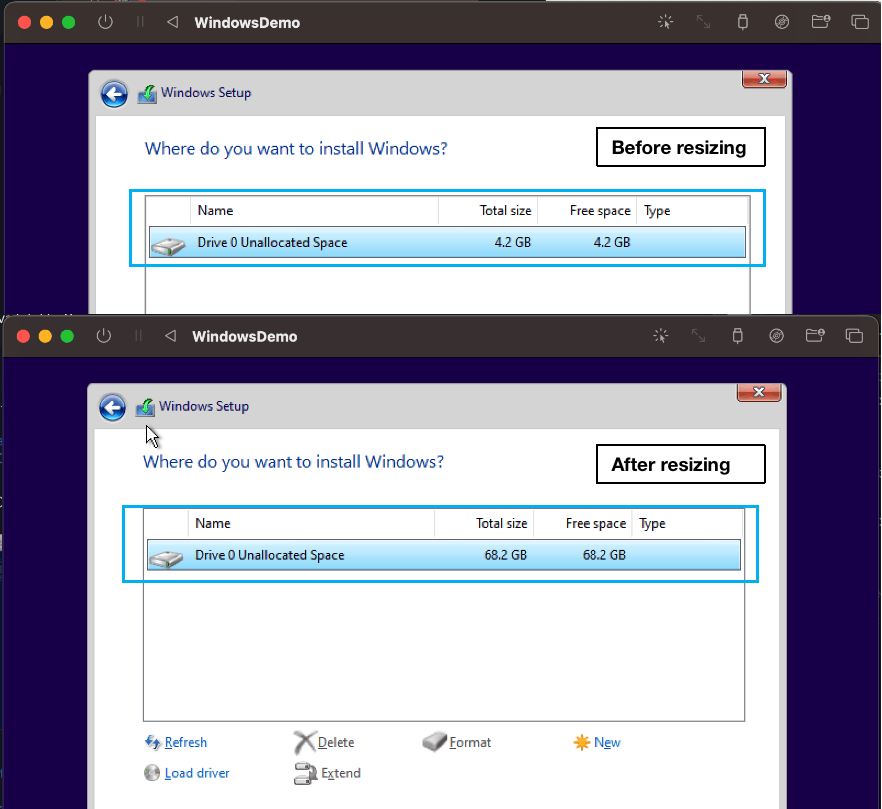
Storage Size
[IMPORTANT]
The minimum system requirements for Windows are 4GB memory and 64GB storage space.
By default, UTM only provisions the VM with 4GB storage space.
You will need to use the
qemu-imgcommand to resize the image storage.
qemu-img resize ~/Library/Containers/com.utmapp.UTM/Data/Documents/<YOUR_VM_NAME>.utm/Images/disk-0.qcow2 +10G
- It is strongly recommended to resize the VM image storage first before proceeding with running the VM. If not, you may risk the increased storage size not being reflected.
Product Key
As I am using the VM for testing purposes, I am using the generic product key that is typically used for evaluation or testing on VMs, to install Windows.
- You can find it with the following keyword search "Windows generic product keys".
Networking does not work
The steps provided in the official UTM documentation work, though the font used caused some confusion
The instruction was "Type in
OOBE\BYPASSNROand press Enter" to restart the VM.I mistook the letter O as zero in the string
OOBE\BYPASSNRO. 🤦🏻♀️
Behaviour Observation
Upon entering the command above, the VM will reboot. This may take some time. If the VM seems stuck, stop and start the VM again
After the VM has started, choose "I don't have internet" > select "Continue with limited setup"
SPICE tools are not installed automatically
It is crucial to install the Windows Guest tools as they include network drivers required for internet access.
Add a new USB drive to load the SPICE tools media. Alternatively, you can choose to eject any existing attached media to load the SPICE tools installation media.
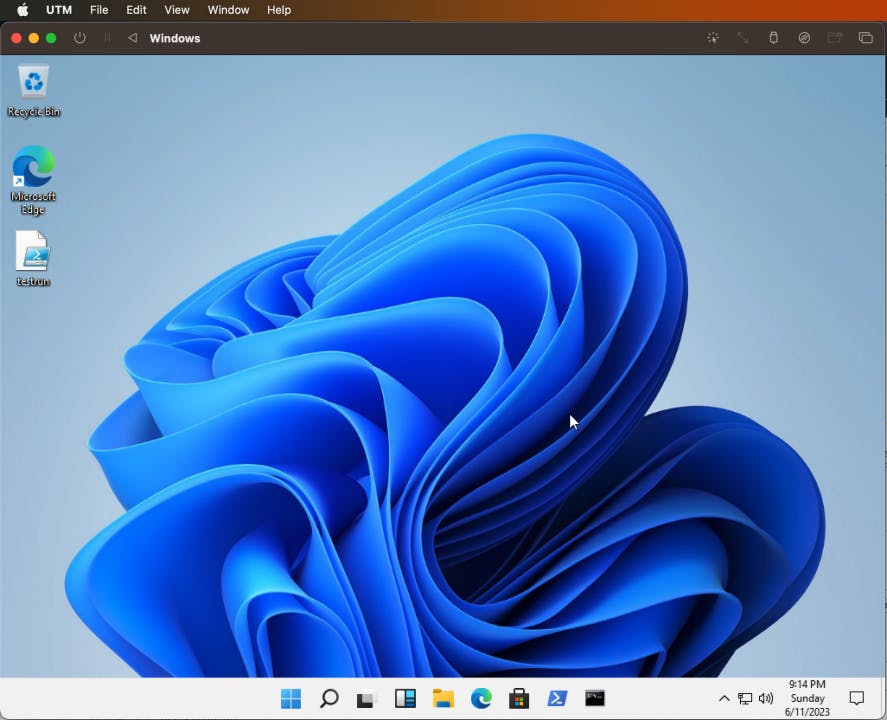
Final Thoughts
The Windows VM is performing decently well for testing usage. Excited to use the VM for testing Windows-specific tools.
Hope you also learn something new today🙌🏼 Cheers!